

How To Make A Statue Mold
John Cannon of The Whimsical Gardens brought his clay sculpture to our facility to make a mold of the figure and and then reproduce it in plastic on a rotational casting machine. The detailed sculpture is pictured below from different angles.
This article details the steps that we took throughout the mold making and casting procedure:
Step ane: Select a Mold Making Method & Mold Safety
Step 2: Construct Mold Box & Fix Sculpture
Step three: Measure, Mix & Cascade Silicone Mold Safety
Pace four: Demold
Step five: Cut the Mold
Step 6: Rotational Casting


Stride i: Select a Mold Making Method & Mold Rubber
Mold Making Method
For this sculpture, we select the "poured block mold" method.
Here are the reasons that we are eliminating other methods:
Brush-on Mold: We are concerned that air bubbling may form in the intricate details on the base of the sculpture. Also, brush-on molds tend to have thick and sparse spots – thin spots end up existence weak points in the mold.
Poured Blanket Mold: One of the steps in the poured blanket mold process is to course a layer of clay on top of the original model (review a poured blanket mold tutorial here). This step would most likely deform the clay original.
Based on the shape of the sculpture, we also know that the mold will require a cutting in order to remove the original sculpture and subsequent castings.
Mold Rubber
For this detail projection, nosotros also know that we want to apply a silicone mold rubber considering it does not require release agent when casting polyurethane resin. Release amanuensis can be difficult to apply in intricate areas and it may be difficult to remove from the casting. Residual release agent can foreclose paint from sticking to castings.
Platinum-Cured vs. Tin can-Cured Silicone Rubbers
Polytek silicone falls into two general categories: platinum-cured and tin-cured. Bones comparisons between the two options are in the table below:
| Condom Type | Advantages | Disadvantages | Casting Materials | Methods |
| Platinum-Cured Silicone Mold Rubbers | No compress on cure, cured rubber has long storage life | Liquid prophylactic can suffer from cure inhibition past some materials (e.g., sulfur clay, tin silicones, Bondo, some 3D-printed plastics, latex safe). | Most materials, peculiarly resins, foams and some low-cook metals. | Pour, Brush, Spray. |
| Can-Cured Silicone Mold Rubbers | No cure inhibition, slightly less expensive than platinum-cured systems | Shrinks on cure (~1%), shorter library life (2-five yrs.) than platinum-cured systems. | Most materials, specially resins, foams and some depression-melt metals. Tin can inhibit polyurethane rubber, platinum-cured silicone, and 14-Serial Poly-Optic Resin castings. | Pour, Brush, Spray. |
Platinum-cured silicone rubbers have advantages compared to tin-cured silicone rubbers (due east.g., no shrink on cure, longer library life), but tin can endure from cure inhibition when exposed to certain materials. Sulfur, for instance, is a known inhibitor and is present in some modeling clays.
We are unsure if John's sculpture contains sulfur, and then we perform a small exam cure.
To do the test, nosotros mix and pour a fast-setting platinum silicone rubber (PlatSil® 71-10) into a clay containment area against a pocket-size section on the backside of the sculpture.
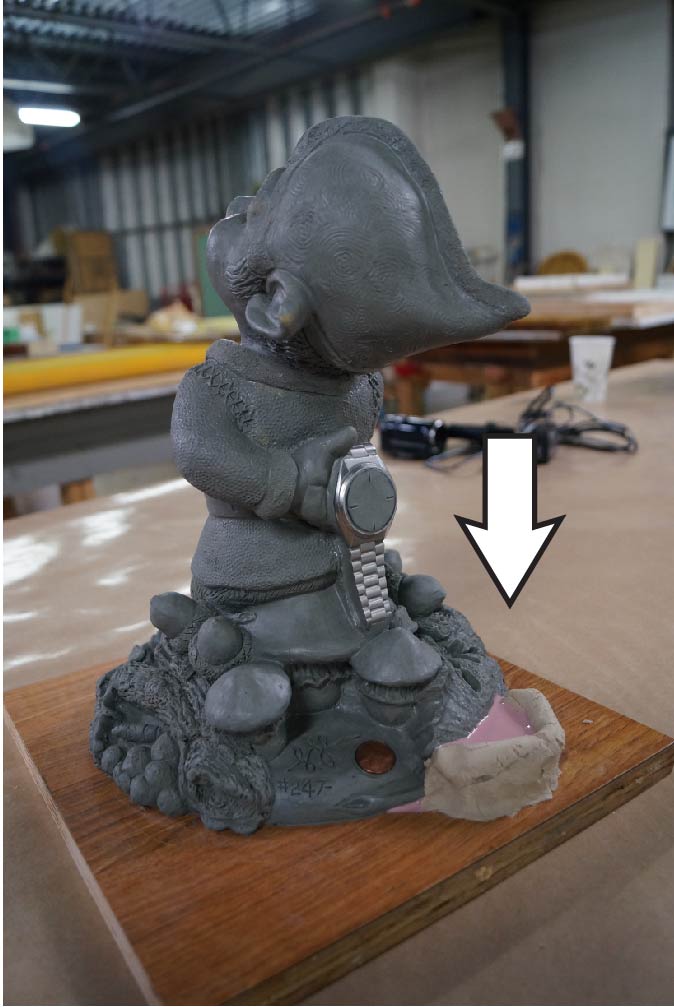

After 30 minutes, nosotros remove the silicone rubber to determine if it has cured properly. We find that the rubber that touched the sculpture remained gummy while the sides of the safe exposed to air and clay cured properly. This indicates that there is a contaminate inside or on the clay that would prevent whatsoever platinum-cured silicone rubber from curing properly.

Based on these findings, we select a can-cured silicone rubber every bit the mold fabric:TinSil® 80-15 Silicone Rubber. We choose a soft silicone (Shore A15) due to the deep undercuts on the sculpture. A harder rubber could be more than hard to remove without damage.

TinSil 80-15 Silicone Prophylactic: Specifications Hardness: Shore A15 Mix Ratio: 1A:10B Cascade Time: 30 Minutes Mixed Viscosity: 12,000 cP Demold Time: 24 Hours Cured Color: Peach Specific Volume: 25.3 in³/lb
Pace 2: Construct Mold Box & Prepare Sculpture
To brainstorm, a plywood mold box is constructed at the proper dimensions (i.e., at least one″ beyond the sculpture in all directions) and so sealed with petroleum jelly.
Note:It is a good idea to taper the inside of the mold box then the mold can be removed more easily when the mold box is turned upside-down.


Politician-Ease® 2500 Release Agent is then practical to the dirt sculpture.
Note: Use Pol-Ease® 2300 if making a polyurethane rubber mold.


The mold box is placed around the prepared sculpture to verify that the dimensions are suitable.

We guess the amount of rubber needed for the mold with the following adding:
Volume of Mold Box = ~1,716 in3
Volume of Sculpture = ~84.78 iniii
Volume of Mold Box – Volume of Sculpture: one,716in3– 84.78 in3 = i,631.22 in3
1,631.22 in3÷ 23.7 in3/lb (specific volume of TinSil 80-fifteen) = 68.8 lb of TinSil 80-15 Silicone Safe

68.8 lb is a large corporeality of rubber and we realize that there is opportunity to reduce that amount by adding corner inserts and other block-outs.


We add a number of block-outs, but notwithstanding maintain at to the lowest degree a 1″ space between the sculpture and mold box walls/block-outs.

In one case all of the block-outs are secured, the mold box is removed to seal the new plywood additions with petroleum jelly and caulk all edges with warmed plasticine clay. Caulking the edges helps to prevent leaking when liquid silicone is poured into the mold box later.


The sculpture is placed back into the mold box and then the mold box is secured with screws.
Footstep 3: Measure out, Mix & Cascade Silicone Mold Rubber
Based on the new dimensions of the mold box, nosotros determine that approximately xl lb of TinSil fourscore-15 Silicone Rubber is needed to make the mold.
As mentioned previously, TinSil 80-xv has a mix ratio of 1A:10B. The components are measured by weight and then mixed thoroughly.
NOTE: Do not attempt to measure out products with 1A:10B mix ratios by volume – ever measure by weight.

Because of the quantity of rubber needed for this project, we mix two separate batches using a turbo mixer.

The rubber is mixed until a compatible color is reached.
Annotation: Avoid hitting the sides of the mixing pail with the turbo mixer as this can introduce air into the mixture.


The batches are then mixed by hand with a Poly Paddle.
Annotation: It is important to scrape the sides and bottom of the mixing container several times, as this is where unmixed material tends to cling.

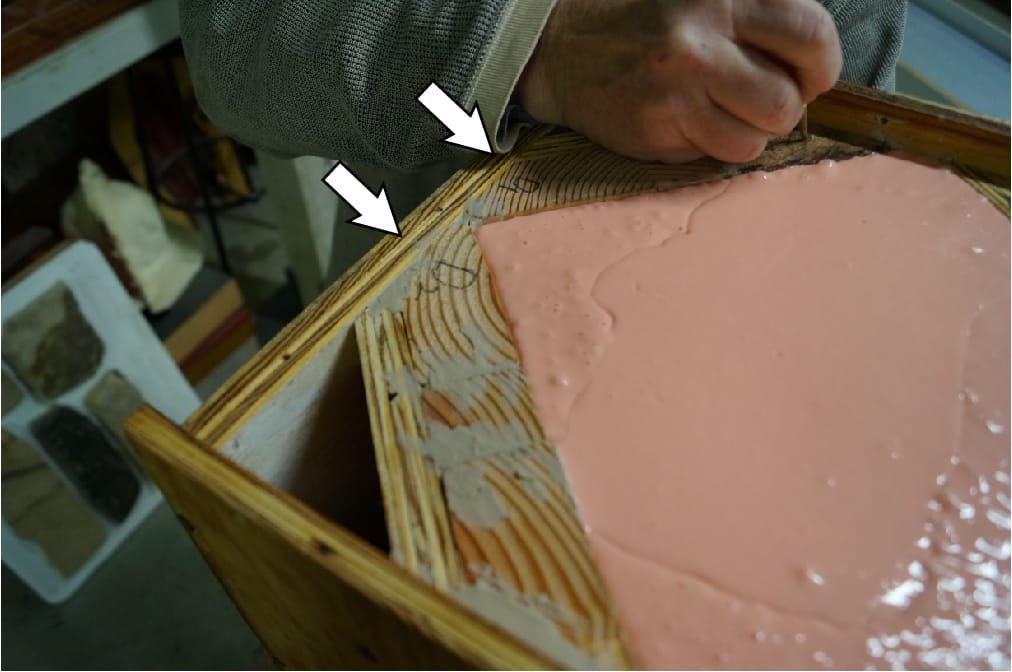
The silicone is poured into the lowest signal of the mold box and allowed to rise.


The rubber is poured until it reaches at least 1.0″ above the highest point on the sculpture.

We allow the rubber to cure at room temperature for ~24 hours. Rut lamps can help speed the cure.
NOTE: Demold times vary by production. Check product Technical Bulletins for this information.

Step 4: Demold
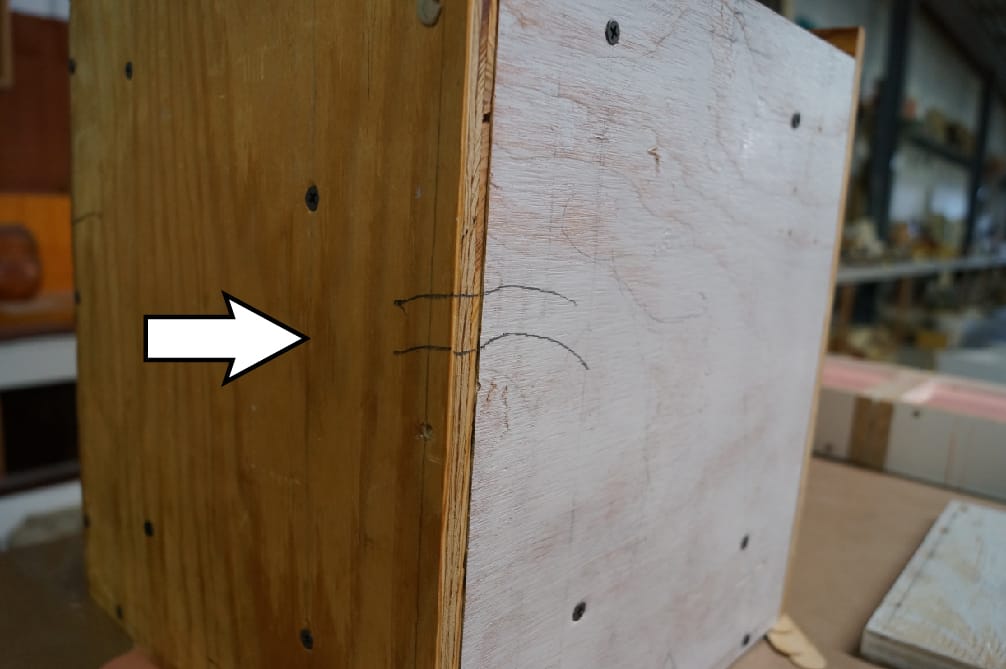
Earlier demolding, the locations of the mold box walls and block-outs are marked with a pen. This is done then that the mold box tin can exist put back together correctly for casting later.


All edges of the mold are loosened from the baseboard with a putty knife earlier the entire mold is removed.

Upon removal of the mold from the baseboard, the sculpture splits in half, leaving the pinnacle half in the mold.

Pace 5: Cut the Mold
To remove the residue of the sculpture and subsequent castings, nosotros prepare to make a cut on one side of the mold. Pictures of the sculpture are printed to determine a skilful location for the cut.
Note:If possible, information technology is best to cutting forth a line that already exists on the sculpture or in an camouflaged location (i.e. avoid the face).

A scalpel is used to make the cut.
NOTE:It is of import to create an irregular cut pattern (i.e., tongue and groove or zig-zag cut) so that the ii sides align well for casting (for general information on cutting prophylactic molds, visit this commodity).


The residue of the sculpture is removed from the mold and any dirt left behind in the mold is cleaned out.


Step half-dozen: Rotational Casting
The mold is placed dorsum into the mold box and and then secured.


Because nosotros plan to use the rotational casting machine, nosotros create a mold box chapeau with a pour pigsty. This hole is where the fast-setting resin is poured in one case the mold box is on the rotational casting machine.

Wooden bars are added to the sides of the box in club to mount and adhere information technology to the rotational casting car.

A silicone plug volition later be used to plug the hole when casting.

The mold box is loaded onto the rotational casting auto and secured with C-Clamps.


EasyFlo 120 Liquid Plastic is the production that we most often recommend for rotational or slush casting. It is designed to gradually solidify over its working time, as opposed to "snap-set" (similar the curing characteristics of EasyFlo 60, another product with the EasyFlo Series). This gradual thickening over the terminal xxx-45 seconds of the working fourth dimension helps to provide an even coat.

EasyFlo 120 Liquid Plastic: Specifications
Hardness: Shore D65
Mix Ratio: 1A:1B past book, 100A:90B by weight
Pour Time: ii-2.5 minutes
Mixed Viscosity: 120 cP
Demold Time: 15-30 minutes
Cured Color: White
Specific Volume: 26.9 in³/lb
Approximately two lb of EasyFlo 120 is thoroughly mixed and poured into the mold.
Note:Ideally, this resin should be mixed and poured in under a minute.

The cascade pigsty is plugged with the silicone plug and then the machine is turned on.


After ~30 minutes, the mold is removed from the rotational casting auto and then the casting is removed from the mold.


For the next run, we mix EasyFlo 120 + Brown PolyColor Dye + Statuary Powder to produce a cold cast bronze copy.

Here are some photos of the common cold cast bronze piece prior to burnishing with steel wool (steel wool is used to expose the bronze powder on the surface of the casting). Initially, castings will appear chocolate chocolate-brown; you lot will find a small spot on his cheek that has been burnished.


Source: https://polytek.com/tutorial/mold-making-tutorial-silicone-mold-of-clay-sculpture/
Posted by: morrisonquithard66.blogspot.com
0 Response to "How To Make A Statue Mold"
Post a Comment